Showing posts with label Sides. Show all posts

Sunday, June 14, 2020

Berry Season! How to Wash and Store


Nothing makes me happier than when the first berry starts to change color! A magical aroma fills the air and assures me that sunshine days are ahead. It is my favorite thing to pick the first berry of the season with the sun on back!


However when I bring them inside, I can see they are typically covered with dirt. I can't put my head in the sand and tell myself they were cleaned in processing and at the store. I know where these berries are from; the gross dirt from my yard. 

But that isn't going to stop me from enjoying the kick off to summer and from making amazing bakes with my homegrown berries. I have been able to find a way that fully cleans the berries and helps them last longer in the fridge. You've spent all that time taking care of the berry bushes in your yard, you are not going to let these precious gems go to waste! 


Here are the steps to take to help you enjoy them to the fullest: 

1. Fill a large bowl with 4 cups of water and a 1/2 cup of white distilled vinegar Add the berries and slow mix them around with your hand, removing the dirt and excess "stuff." There is a science behind why we use vinegar, and if you really, really want to know check out this article. Let the berries soak for at least 5 minutes. 

2. Using a colander, remove the berries from the water and rinse. Make sure to rinse well to remove any excess vinegar so you can't taste it. 

3. For the softer berries, place them out on a towel, but if they are sturdier like blueberries or strawberries you can use a salad spinner to dry. 

4. Then line an air-tight container with paper towels and add the berries. I leave one corner up to stop condensation from collecting and causing mold.

Share:
Continue Reading →

Monday, November 5, 2018

Fabulous Make Ahead Dinner Rolls

I'm a huge fan of the freezer. Anything I can do ahead of time and just pull out of the freezer is my go to. It's such an under-utilized tool in the kitchen, and ends up just being a storage space for most. I like to clean mine out and fill it with recipes like this.

Dinner Rolls

Why I like this recipe: 

  • It can be made a month ahead of time! I make these in the beginning of November and then pull them out 3 hours before Thanksgiving dinner. 
  • The rolls turn out perfect every, single time! Some bread recipes can be fussy and not rise one time and then be a showstopper another. This one provides me with consistent results. 
  • These rolls can be served with any type of meal: Thanksgiving, southern style, pasta, chicken etc. Very versatile in how many meals they can complement!
Dinner Roll Ingredients
Ingredients:
  • 3 Tbsp unsalted butter, plus more for greasing
  • 1 1/2 cup milk (whole or half and half)
  • 1/3 cup honey
  • 4 Tbsp shortening (can use butter if you don't have)
  • 5 - 5 1/2 cups of all-purpose flour
  • 1 Tbsp yeast
  • 2 tsp salt
  • 1 egg, plus 1 egg beaten with 1 Tbsp water
To begin, place the oven rack in the middle and preheat the oven to 200 degrees. Once preheated, turn the oven off and try to minimize the amount of times you open the oven door. Using butter, grease a large bowl and a 9x13 pan lined with foil. 

Place milk, honey, butter, and shortening in a microwave proof bowl, and heat for 1 - 1 1/2 minutes, until the mixture reaches approximately 110 degrees. Do not overheat the milk as that will prevent the rolls from rising. Whisk together until all the butter and shortening is melted. 

Milk, honey, butter, and shortening

In a mixer with a dough hook, add 4 1/2 cups of flour, salt, and yeast (make sure the salt and yeast are on separate sides of the bowl, like the picture below). Turn the mixer on low, and slowly add the milk mixture until combined, approximately 1 min. Increase the speed to medium and add the egg, allowing the dough to come together until it's smooth, about 2 minutes. Add another 1/2 cup of flour and mix for 6-7 minutes on medium. The dough should be smooth and have a shine; if it's sticky or wet, add up to 1/2 cup of flour more. 

Keep salt and yeast separate

On an un-floured surface, knead the dough by hand (1 -2 minutes). Once it's together in a ball and smooth, place in the greased bowl, cover with plastic wrap, and place in the oven. The dough will prove for 50 - 60 minutes, and should double in size. 

Knead the dough

Once done proving, place the dough on a floured surface. Punch the dough down, and place on a scale. Divide the weight of the dough by 15, and you will have the weight of one roll. Measure each piece and roll into a ball, making sure the top is nice and smooth. Place each roll into the foil lined pan (the rolls should be lightly touching each other) and cover with plastic wrap. Place the pan in the oven, and allow the rolls to double in size (50 - 60 minutes). 

Rolled dinner rolls

Once the rolls are done proving, take them out of the oven and preheat to 375 degrees. Take off the plastic wrap, and brush the egg mixture on top of each roll. Make sure to get the egg wash on the sides of the rolls that are visible at the top. Once the oven is ready, bake the rolls for 25 - 30 minutes until the tops are golden brown and the bottoms are cooked. I take the rolls out of the pan and gently pull down the foil to confirm the bottoms are cooked fully. 

Once the rolls are done, allow them to cool with the foil lining for 1 hour. After an hour, remove the foil and let the rolls cool for 2 hours. Once they are fully cool, they rolls should be wrapped in plastic wrap, then foil, before placing in the freezer. They can be kept in the freezer up to a month. 

The day of "roll consumption," take them out of the freezer and allow to thaw for 2 hours. Remove the plastic wrap and re-wrap them in the foil. Warm the rolls at 375 degrees for 30 minutes and serve warm.

Make Ahead Dinner Rolls

Realistic Me
Share:
Continue Reading →

Thursday, July 5, 2018

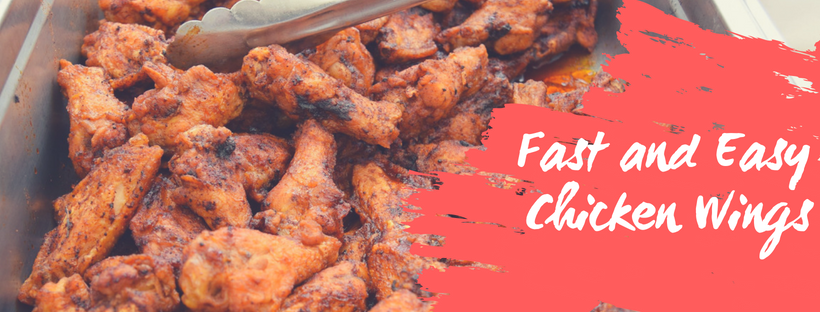
Fast and Easy Grilled Chicken Wings


I don't know what it is, I absolutely love wings. I know it isn't very culinary or fancy; however, they just make me so happy. Normally I would have to go out to a pub to get some good wings, but I would leave with a heavy bar tab and not feeling like it was worth the money! Here is my remedy to this situation, and to make it even better, it is fast and easy!
Fast and Easy Chicken Wings

Why I love this recipe:

  • This seems like a silly reason, but I only use two measuring spoons for the whole recipe. Aka...less dishes, less thought: just through in a teaspoon or a half teaspoon of that in there!
  • The grill keeps the heat out of the house on hot summer days. 
  • I also claim I do not know how to work the grill, so my husband does all the cooking. Shhh....don't tell him I really do! 
  • These wings aren't heavy, and the recipe is actually pretty healthy! It doesn't leave you feeling like you will have to run miles to work off what you just ate.
  • They come out so crispy, it is just like they were fried! This way you don't have the oil, and potential fire hazard of frying yourself!
  • You can double, triple, or quadruple this recipe and make it for a crowd! Looks like a lot of work, but it really isn't! If you have an event, it is a cheap way to provide amazing food!
Wings on the Grill

Ingredients:
  • ½ cup salt
  • 2 quarts of water
  • 2 pounds chicken wings or drumsticks
  • 1 ½ teaspoons cornstarch
  • ½ teaspoon pepper
  • 1 teaspoon chili powder
  • 1 teaspoon paprika
  • ½ teaspoon garlic powder
  • ½ teaspoon dried oregano
  • ½ teaspoon sugar
  • 1/4 teaspoon cayenne, optional
Mix the water and salt in a large bowl and then place the chicken in the water. Cover and let the chicken brine in the refrigerator for approximately 30 minutes. 

Dry Rub Spices for Wings

While the chicken is in the fridge, mix all the remaining seasons together in a small bowl. Don't be alarmed that the seasons all together look "pale." They brighten up once you put them on the chicken. 

Wings Ready to Go

Heat your grill accordingly (gas: heat for 15 min on high), then turn down to medium-low. Place the wings skin side up, and cook for 10-12 minutes. Flip the chicken, and let the skin crisp up for 10 minutes more of cooking. Once removed from the gill, cover with foil and let rest for 5 minutes. 

BBQ Wings for a Crowd

Share:
Continue Reading →

Wednesday, June 27, 2018

The Classic Make-Ahead Minestrone Soup

I love soup, it is suppose to be an easy, healthy meal. However at times I look up recipes and realize there are more steps than dumping the ingredients into a pot and heating it up. That leaves me with the option of store brand soup which typically are tasteless and minimal. So I set out to find a wonderful soup that will fit into my busy schedule and fill me up!

Make Ahead Minestrone Soup

Why I like this recipe:
  • It is in the title! Make-ahead: I do love a make-ahead meal recipe! This is frozen and you just have to pull it out of the freeze, thaw, and warm up for delicious homemade soup! 
  • Since I freeze this and it is make ahead, it is perfect if I am preparing an Italian themed dinner with guests. All the stress of hosting is so much easier if you have things made ahead of time to eliminate the things to do day off. 
  • This sounds like a silly reason to like a recipe, but once I'm done chopping, I put the ingredients immediately into the pot. No setting aside and adding at different times! Saves on dishes and having to think about where you put those pesky little carrots. 
  • The Parmesan cheese rind really brings out a wonderful texture and flavor to the soup! 
Minestrone Soup
Ingredients:
  • 1 leeks, sliced thinly
  • 2 medium carrots, peeled and diced
  • 2 small onions, diced
  • 4 celery ribs, diced
  • 1 russet potato, peeled and diced
  • 1 zucchini, diced
  • 28 oz whole tomatoes, drained (reserve sauce), roughly chopped
  • 8 cups of water
  • Parmesan cheese rind
  • 1 tsp salt
  • 15 oz can of cannellini beans, drained and washed
  • 3 cups of spinach
  • 1/4 cup basil pesto (or a rosemary, garlic, and olive oil mixture)
Add the diced vegetables, tomatoes, water, cheese rind, and salt to a large pot and bring to a boil. (See picture for the size of each diced vegetable) Once boiling, turn the heat down to medium-low and allow it to simmer for an hour. The vegetables should be tender, but not falling apart. If the mixture looks too think, add some of the reserved tomato sauce for liquid. Allow the mixture to cool and freeze for up to a month (or refrigerate up to 3 days.)

Cut Vegetables for Soup

Thaw the soup if frozen, and return to a large pot. Add the beans and spinach and heat until hot, about 5 minutes. Remove from the pot from the heat, discard the cheese rind, and add the basil pesto. Adjust any seasonings to taste, and serve!

Share:
Continue Reading →

Easy French Puff Pastry: Gougeres

This recipe is so good, and they seem to disappear quickly! Might consider making this a double batch as they are inhaled almost immediately. It seems like you eat one, and are immediately reaching for another! A good problem to have!

Why I like this recipe:
  • This recipe has so many make ahead options; and, I love things I can make ahead! I either make the dough and cover in the fridge before baking. Or if I have enough room in my fridge, I scoop them out onto the baking sheet and cover in the fridge until ready to be baked. Or I bake them completely ahead of time and give them a quick warm up in the oven before eating. So many options makes it a great recipe to fit into a busy schedule. 
  • To warm up previously frozen gourges, put in the oven at 300 degrees for 7-10 minutes.
  • Ingredients are minimal and commonly found in the pantry, so you can whip them up quickly when having unexpected company (or poor planning on my part). 
Ingredients:
  • 2 eggs and 1 egg white
  • 1/4 tsp of salt
  • 4 Tbsp of butter
  • 1/2 cup of water
  • 1/8 - 1/4 tsp cayenne
  • 1/2 cup of flour
  • 1 cup shredded cheese (preferred gruyère cheese)
Preheat the oven to 425 degrees, and line two baking sheets with parchment paper.

In a 1 cup measuring cup, take the eggs and salt and whisk completely together. If you have more than 1/2 of a cup after mixing, remove excess. Having too much egg will make your dough have too liquid to rise into a puff. Over medium heat add the water, butter, and cayenne in a small sauce pan until simmering. Once at a simmer, add the flour and quickly stir together until it combines into a ball shape. 

Add the dough into a food processor and mix quickly for 10 seconds, allowing the steam to come out of the opening. While mixing, slowly add the egg, then the cheese and process for 30 - 40 seconds. The dough should be dense and have a creamy, batter type of consistency. Using a Tbsp, level the dough, and using another small spoon to scoop it out onto the baking sheet. Once done, you should have approximately 24 puffs.


Bake for 15 - 20, until 2/3 of the puff are golden brown. Then turn off the oven and continue to bake for another 10 minutes. Make sure not to open the oven too much when checking on the puffs while the oven is off. Serve fresh out of the oven and warm.


<!-- Global Site Tag (gtag.js) - Google Analytics
-->
Share:
Continue Reading →

Tuesday, January 16, 2018

The Best Paleo Granola


Granola can be so expensive it boggles my mind, and I hate it when the taste doesn't add up to the price. Then, if you add gluten free or Paleo in front of the name, you will be paying astronomical prices with an even worse taste. Well if you are like me, you'll love this recipe.

Best Paleo Granola
Why I like this recipe:
  • I purchase a large amount of almonds and pecans from Costco, and then chop them all in the food processor at one time. I put all the chopped nuts in a ziplock bag and measure what I need as I make a batch. This saves time chopping the nuts each time I want to make this recipe. 
  • This is my preferred granola recipe, regardless of whether I'm doing Paleo or not. It's so tasty!
  • One batch is enough for several breakfasts, so I have granola all week to help with the busy mornings.  
  • Also a create recipe to consider for a crowd or brunch event. 
Paleo Granola Ingredients

Ingredients:
  • 2 cups chopped almonds
  • 2 cups chopped pecans
  • 2 cups unsweetened flaked coconut
  • 1/2 cup sunflower seeds
  • 1 1/2 cups raisins
  • 1/2 cup maple syrup
  • 1 Tbsp vanilla
  • 1 1/2 tsp ground cinnamon
  • 1 tsp ground ginger
  • 1 tsp kosher salt
  • 1/2 tsp pepper
  • 1/2 tsp ground allspice
  • 1/4 ground nutmeg
  • 1/4 cup melted coconut oil
Preheat the oven to 325 degrees. Combine the almonds, pecans, coconut, seeds, and raisin into a large bowl and gently mix together. Then mix the remaining ingredients in a microwave proof bowl (or measuring cup), and microwave quickly for 15 seconds. Add the warm mixture to the nuts and thoroughly mix together.

Paleo Granola Baking

Line a rimmed baking sheet with parchment paper, and gently press the granola onto the sheet. Make sure to press down to the rim of the baking sheet and compacting together. Bake for 25 - 30 minutes until golden brown and fragrant. Allow the granola to cool for 30 minutes before breaking apart into desired consistency. Store in an air tight container until ready for consumption.

Finished Paleo Granola

The Best Paleo Granola
Share:
Continue Reading →

Monday, January 15, 2018

5 Minute Apple Sauce: The Perfect Recipe for Busy People


As a Washington native, you can determine from the smell in the air when it is apple season. The cool breeze will tell you when you should head out to pick apples on the orchard. The best deals are if you hike slightly out of the city and get the apples fresh from the orchard. So naturally you come home with boxes of beautiful, crisp apples.

5 Minute Apple Sauce

Why I like this recipe:
  • Almost no prep time needed and the slow cooker does all the work!
  • This recipe is chunky and thick! I hate it when apple sauce in the slow cooker comes out with a water, soup texture.
  • Along with no prep time, there isn't much to clean up afterwards! It is only my apple cutter and measuring cups that go straight into the dishwasher after preparing the ingredients. 
Washington Apple

Ingredients:
  • 10 apples, cored and cut into 2 inch pieces
  • 1/4 cup sugar
  • 1/2 tbsp cinnamon or 3 cinnamon sticks
  • 1 cup of water
  • 1 tsp lemon juice
Put all ingredients into the slow cooker, and cook on low for 6 hours. The sauce will need to be gently stirred, until your desired consistency level.

5 Minute Apple Sauce

5 Minute Apple Sauce: The Perfect Recipe for Busy People
Share:
Continue Reading →

Saturday, December 16, 2017

Best and Easy Ciabatta Bread


I absolutely love bread! When it comes to the smell, the flavor, and enjoying it with an excellent pairing, it is the best. However when it comes to making it, I normally stay away. The time it takes kneading the dough by hand and following the detailed steps, makes it not fit into my schedule.


That was the case, until I ran across this ciabatta bread recipe. It turns out so flavorful, and it is wonderful to served with a side of cheese or olive oil. It doesn't take much prep time, and there is no kneading by hand. You have to try this recipe!

Amazing Ciabatta Bread

Why I like this recipe:
  • The ingredients are simple and minimal. The added perk is that I typically have everything I need without running to the grocery store.
  • No need for hand kneading. The whole recipe is done with a dough hook attachment for the mixer, which eliminates room for error.
  • It makes 4 loaves in one batch!
  • Bread can be so stressful to me! Will it rise, will I knead it right? This recipe takes out all that stress and it is very simple, especially if you are averse to making bread. 
  • Comes out better than the store brand! I have made rolls and they turn into hockey pucks, and I just wished I went to the store and bought some. This recipe is not like that and is worth the time to make at home. 
Best Ciabatta Bread

Ingredients
  • 4 cups of flour, extra for dusting
  • 1 Tbsp of salt
  • 1 Tbsp of yeast
  • 3 Tbsp of olive oil
  • 2 1/2 cups of water
  • Semolina, optional
Place the flour, salt, and yeast in a mixing bowl with the salt and yeast on separate sides and away from each other. Add 3/4 of the water, and mix with a dough hook until the dough begins to form. Then slowly add the remaining water, and mix on medium-high speed for 5 - 8 minutes. You should hear the dough slapping against the mixing bowl. The dough should be elastic and springy when done. Lightly grease a 2 -3 quart square tupperware and the lid with olive oil using your hands.

Salt and yeast on separate sides of mixer

With olive oil still on your hands, put the dough in the greased tub, cover, and prove for 1-2 hours until it has doubled or tripled in size. My dough took a little over 1 hour, and collapsed slightly when I removed the lid. I then covered it with a damp cloth and let the dough rise back to the top of the container.

Bread first in the tupperware
Dough rise to the top


When the dough is done, line two trays with parchment paper. Dust your counter with flour and semolina, and then slowly tip the dough out of the tub. Make sure you keep the square shape as best as possible. Then dust the top of the dough with more flour and semolina to aid cutting.

Ready to go in the oven

Trying to keep the air in, cut the dough into four long pieces. Slightly squishing together to pick it up, lightly stretch out the dough on to the tray, cut side up. Preheat the oven to 450 degrees and let the dough rest for 20-30 minutes. Bake for 25-30 minutes, rotating racks halfway through. The loaves should be golden brown and have a hollow sound when tapped.

Ciabatta done and ready to eat

Best and Easy Ciabatta Bread
Share:
Continue Reading →

Friday, October 6, 2017

Guacamole

Guacamole is so easy to make; however, people decide in a mad rush to buy it from the store. Now if your guests are waiting at your home and you're still at the store, then yes, buy the guacamole and run! On the other hand, if you have 5 to 10 minutes to spare, it is worth your while to make it homemade. The difference is so noticeable, and this recipe in particular is always a hit. I have made this for several different groups and it pleases all different palates.

All the ingredients for guacamole

It starts with my secret, which I am happy to share. Scoop the avocado into a large bowl and mash until in large chunks, then add half of the lime juice. Adding the lime juice allows the avocado and lime to marinate while you add and mix the other ingredients. This also prevents the lime juice from separating from the guacamole after sitting out at room temperature. Once the lime and avocado is combined, add the seasonings and mash the avocado into your desired texture. Then fold in the onions, jalapeno, tomatoes, cilantro and garlic. Do a taste test, and add the remaining lime juice until you are satisfied. This recipe can be served immediately or set aside for an hour.

Finished guacamole

Ingredients:
3 avocados, chopped - see how to video here
1 lime, juiced
1/2 teaspoon salt
1/2 teaspoon ground cumin
1/4 teaspoon cayenne
1/2 medium white onion, diced
1/2 jalapeno pepper, seeded and minced
2 tomatoes, seeded and diced
1 tablespoon chopped cilantro
1 clove garlic, minced

Scoop the avocado into a large bowl and mash until in large chunks, then add half of the lime juice. Once the lime and avocado is combined, add the seasonings and mash the avocado into your desired texture. Then fold in the onions, jalapeno, tomatoes, cilantro and garlic. Do a taste test, and add the remaining lime juice until you are satisfied. This recipe can be served immediately or set aside for an hour.
Guacamole
Share:
Continue Reading →